Creating simulation attacks for spreading security awareness among users
Now that you know how to protect your tenant by enabling the Defender for Microsoft 365 default security policies, it’s time to test the security knowledge of your users. Because if your users are not vigilant, they can easily compromise the tenant security, regardless of how strong your security policies are.
Defender for Microsoft 365 helps you launch different kinds of simulation attacks on your users to test their security awareness. It simulates many social engineering attacks like credential harvesting, malware attachments, drive-by URLs, etc., that help your users become proactive against various cyber-security threats. These simulation programs also help you set up Microsoft-recommended training programs for those who fail these security attacks.
In this article, let’s understand the various elements of a simulation attack and how you can launch one in your tenant from the Microsoft 365 Defender portal.
Accessing Defender for Microsoft 365 Simulation Attacks
The simulation attacks are available under the Attack simulation training page. This page can be accessed in the following two ways.
- Selecting the Attack simulation training page from the Email & collaboration menu as shown in Figure 1 in the Microsoft 365 Defender portal. [OR]
- By visiting the Attack simulation training page directly by clicking on this link: https://security.microsoft.com/attacksimulator

Both lead you to the Attack simulation training page shown in Figure 2.

Launching a Simulation Attack
aFollow these instructions to launch a simulation attack.
- Select the Launch a simulation button shown in Figure 2.
- The Select technique page opens as shown in Figure 3. Here you get to choose the social engineering technique you want to launch on your target.
- Credential Harvest – simulates a credential theft or harvest attack.
- Malware Attachment – simulates a malware attachment attack. .
- Link in Attachment – simulates a link in an attachment-based credential theft attack.
- Link to Malware – – simulates link to malicious file being shared attack.
- Drive-by URL – simulates link to malware hosted elsewhere attack.
- OAuth Consent Grant – simulates consent grant attack that goads targets to grant access permission to their data or files.
- How-to Guide – teaches targets how to report a message (mail) as phish in Outlook. This is a security lesson, not an attack.
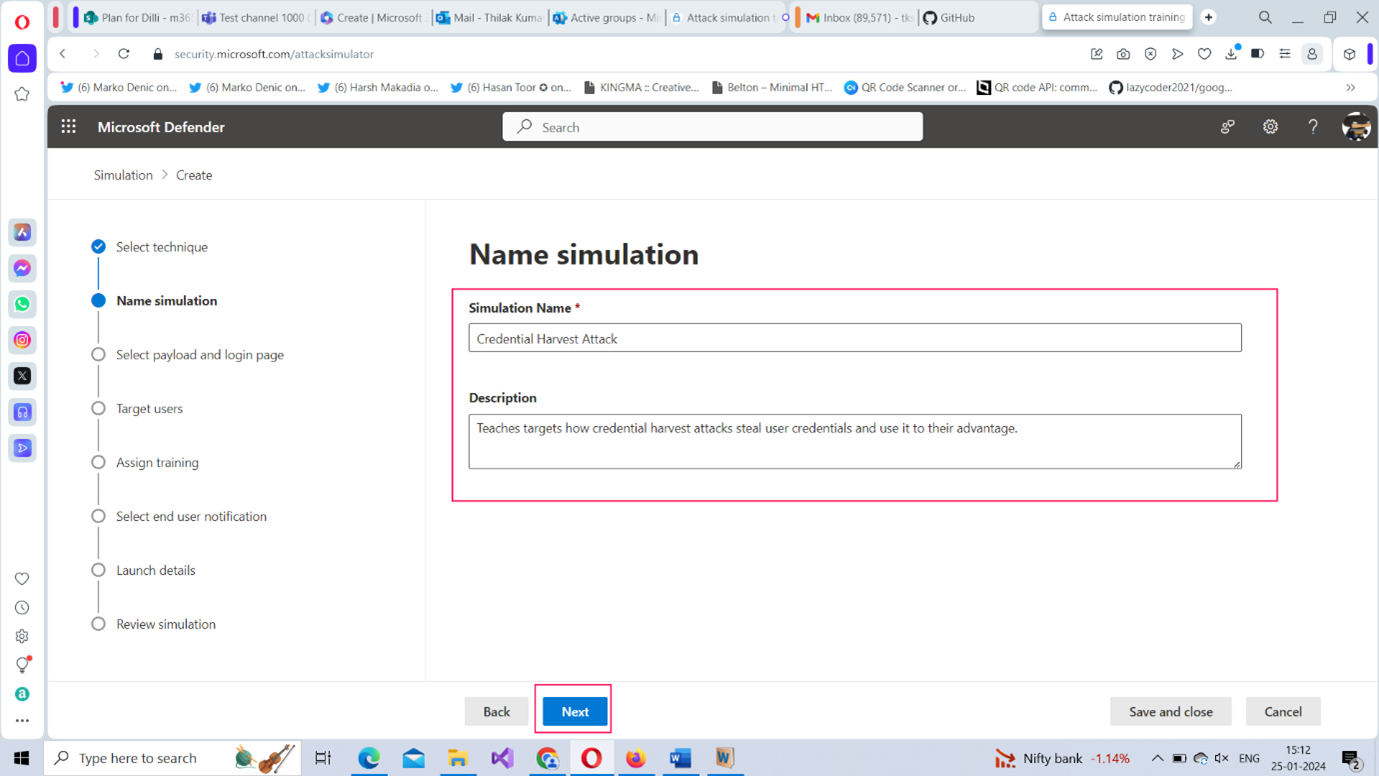
- Enter a name and description for the simulation attack as shown in Figure 4.
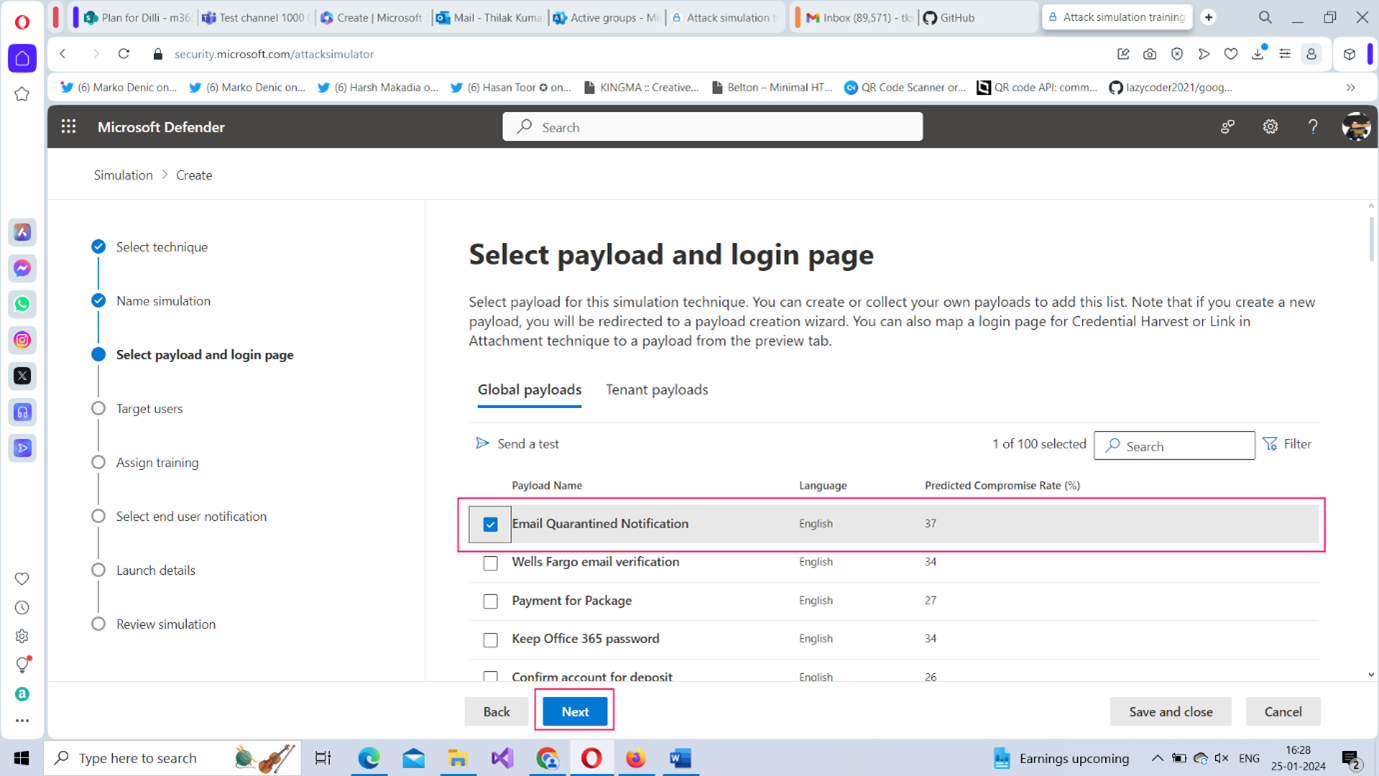
- Select payload and login page: Payload refers to the means or channel using which the attack is going to be executed. This could be a simple login form (in the case of a credential harvesting attack) or an email with a malicious attachment/link etc., Payloads vary depending on the social engineering technique you choose. For a Credential Harvesting attack, you get the payloads as shown in Figure 5. Let’s select the Email Quarantined Notification option as the front for carrying out the attack and click Next to proceed further.
- Target users: : You can either include all the users in your organization or choose specific users/groups as the target. Let’s choose Include all users in my organization option and click Next to proceed further as shown in Figure 6. For a Credential Harvesting attack, you get the payloads as shown in Figure 5. Let’s select the Email Quarantined Notification option as the front for carrying out the attack and click Next to proceed further.
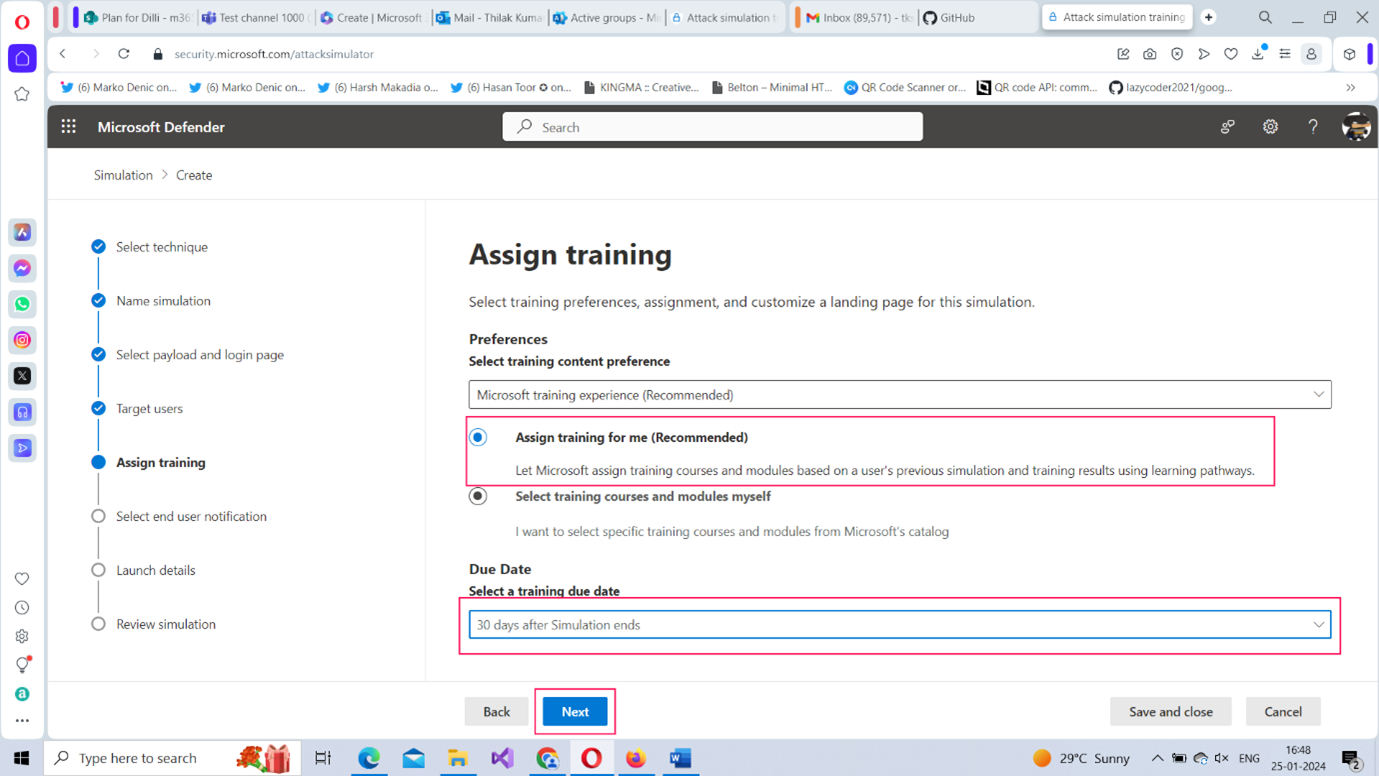
- Assist Training: : This section helps you choose the training programs to be assigned to those targets who fail the security test. It is recommended to go with the default option Assign training for me (Recommended) – as shown in Figure 8 - where Microsoft selects the training programs for the targets. Note: You can also set a due date for the training. 30 days after Simulation ends is the default option.
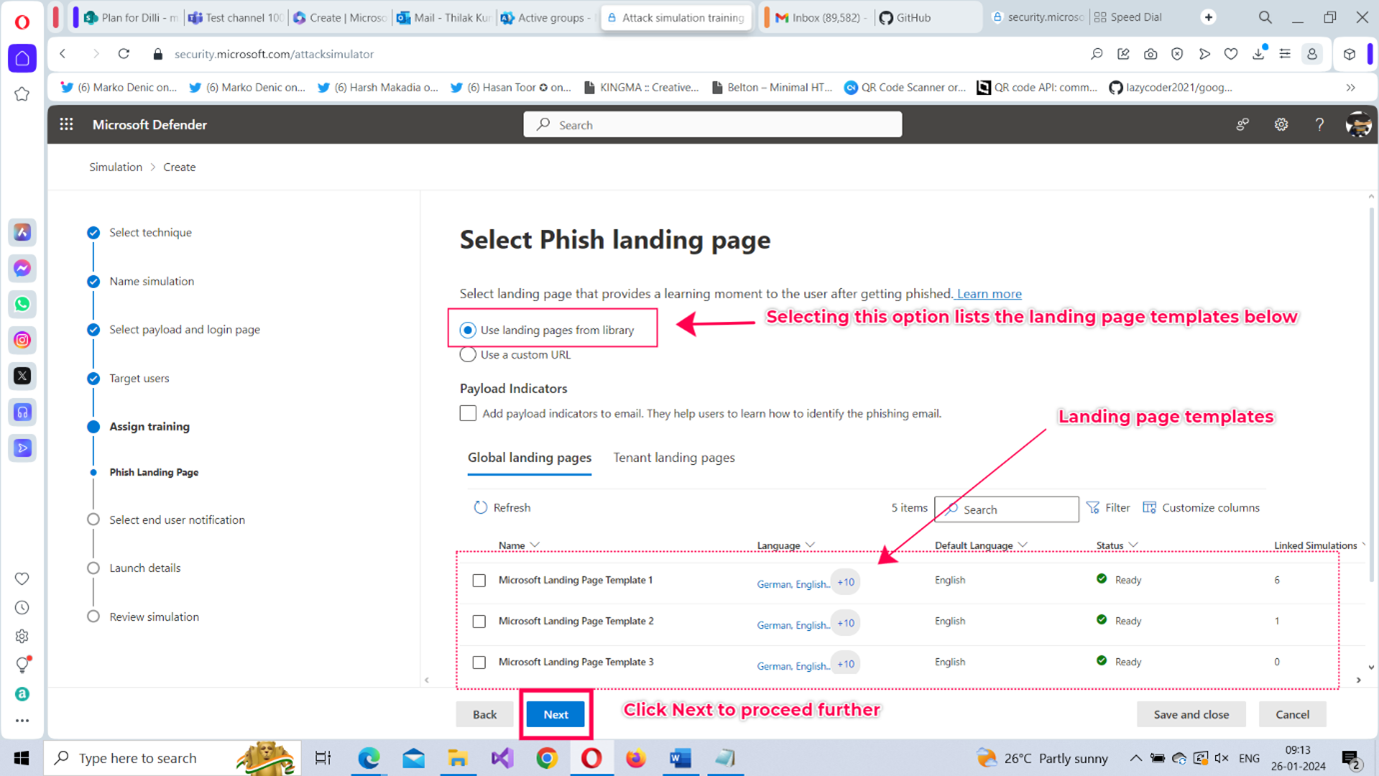
- Select Phish landing page: : Here you can select the page the targets would land on once they get phished. You can either select the landing page from the library or use a custom URL (if you have your landing page set up) as shown in Figure 9.
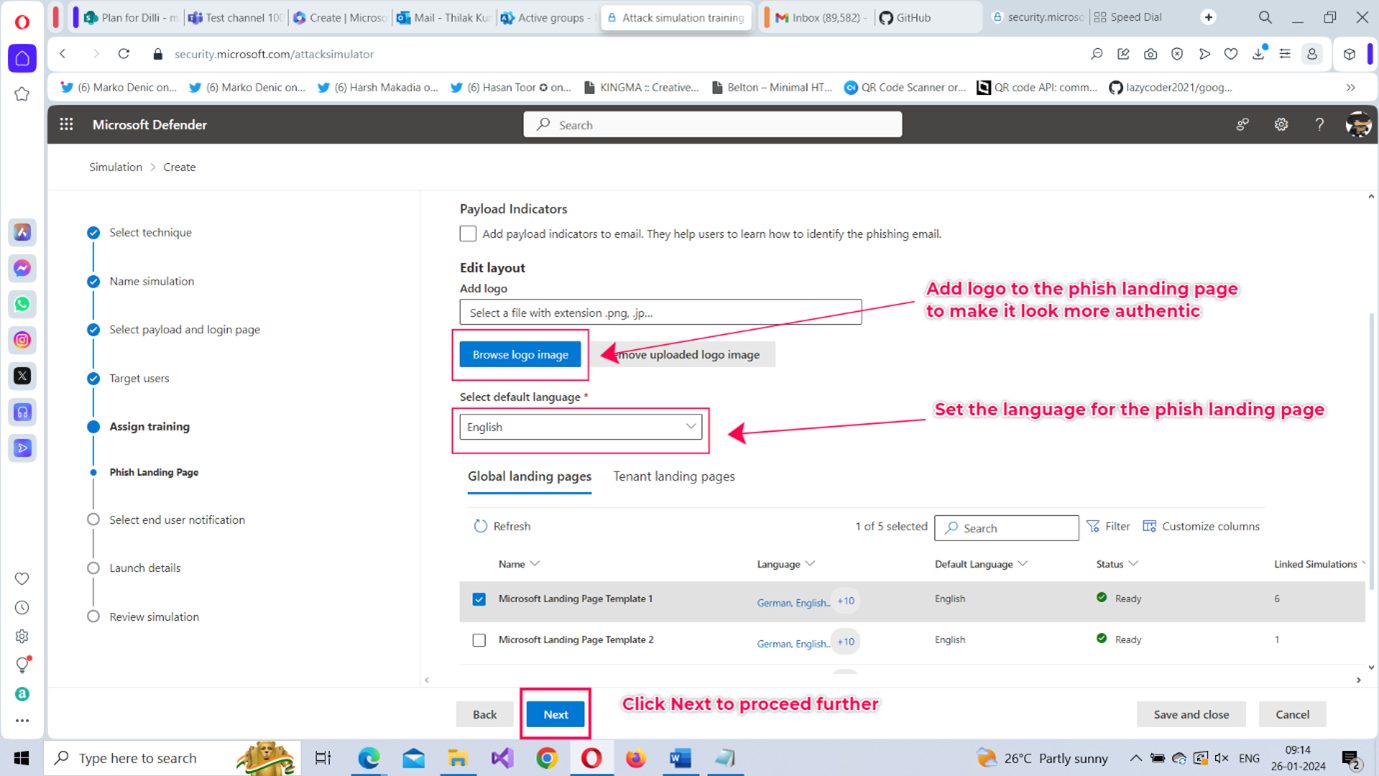
- Once you select the landing page template from the library (as shown in Figure 10), you can set the language preference (English is the default option) and add a company logo to the phishing mail by clicking Browse logo image to make it look authentic. Note: You can also add payload indicators to the email by enabling the Payload Indicators checkbox. These indicators help targets learn how to identify phishing mail.
- Click Next to proceed further.
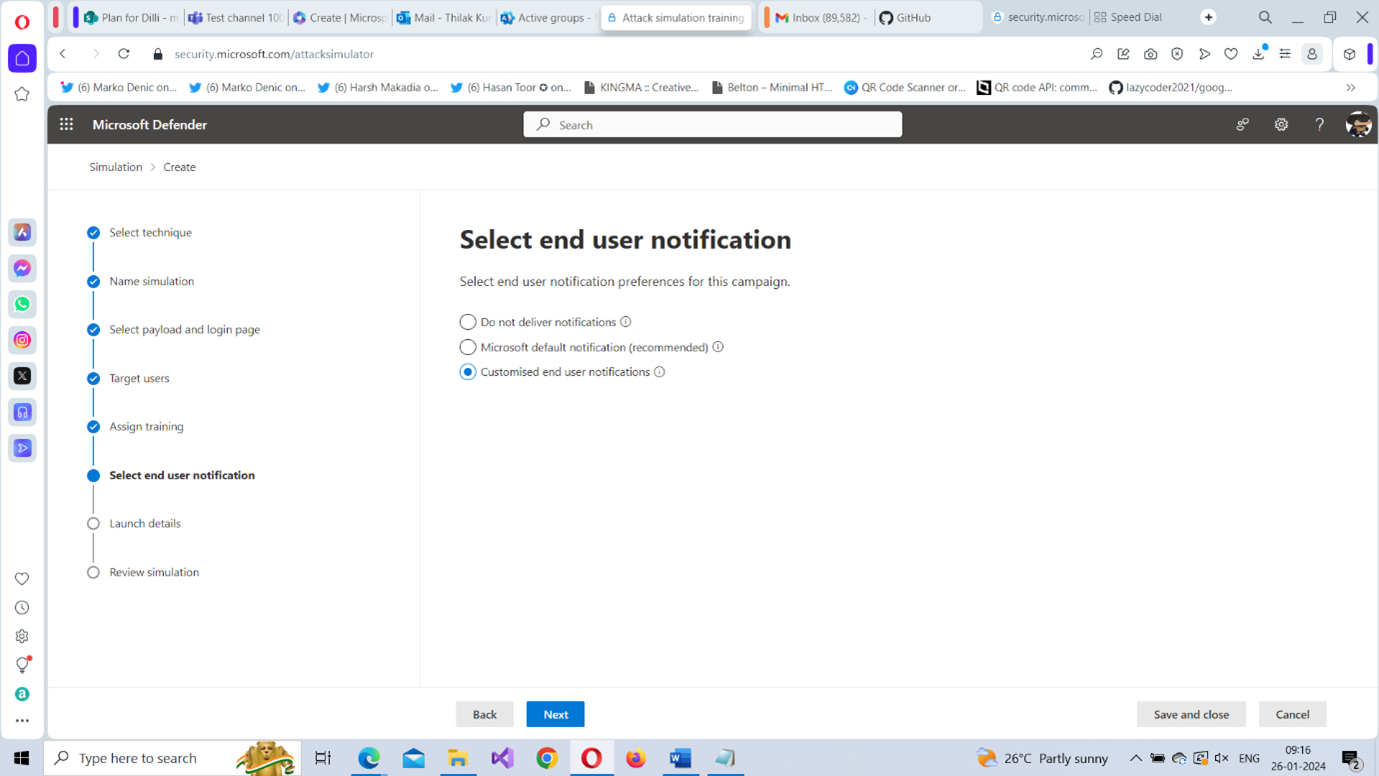
- Select end-user notification: : Here you get to set up the end-user notifications to be delivered to your users as a part of the simulation attack campaign. You have three options to choose from (as shown in Figure 11):
- Do not deliver notifications – no end-user notifications are delivered.
- Microsoft default notification (recommended) – Microsoft default notifications are delivered. The best option to choose for the launch of your first simulation attack campaign.
- Customized end-user notifications – you can set up custom notifications as per your requirements. Best to use this option after gaining some experience handling simulation attacks.
- Select the Microsoft default notification (recommended) option. Doing so opens the following additional options (as shown in Figure 12) that you can configure.
- Select default language – English is set as the default language which you can modify to the language you prefer.
- Microsoft default positive reinforcement notification (recommended) – delivery preference – you can choose to send these notifications either during the simulation or after the simulation ends.
- Microsoft default training reminder notification – you can choose to send these notifications on a weekly or bi-weekly basis.
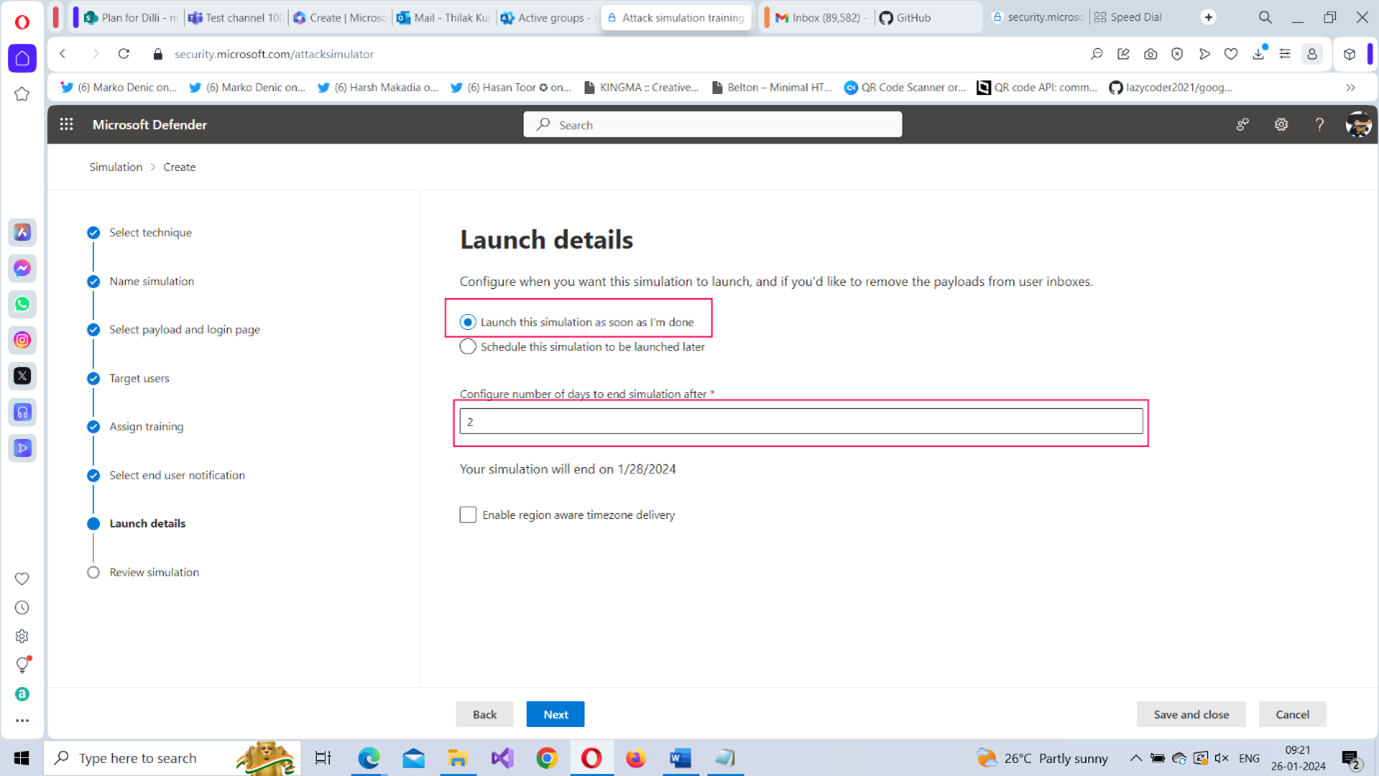
- Launch details: Here you decide when to launch the simulation attack as shown in Figure 13.
- You can either launch it immediately or schedule it to be launched at a later date. (You will probably want to launch it immediately – at least for the first time – to understand how the simulation attack works). Select the Launch this simulation as soon as I’m done option.
- You can also decide how long the simulation attack is going to last by entering the number of days in the Configure number of days to end simulation after box. [A month or 30 days is an ideal number].
- Click Next to proceed further.
- Review Simulation: You can review the simulation attack details here as shown in Figure 14 before it is launched. Click Submit to launch the simulation attack after the review.
Note: The Send a test button helps you send the phishing mail to yourself and check whether it gets successfully delivered or not.
Note: Social engineering technique is a technique that persuades targets to divulge personal info, or goads them to click on malicious attachments or links after gaining their trust.
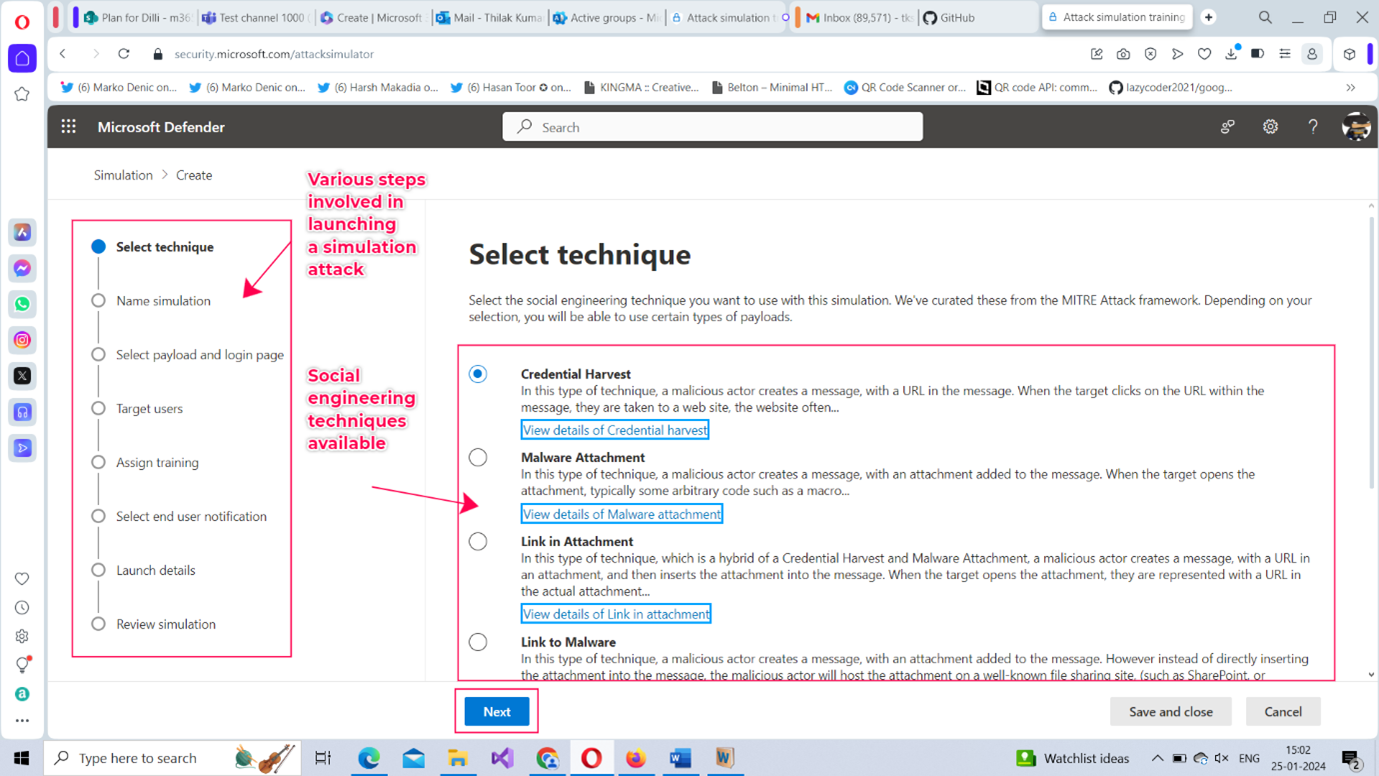
Let’s go with the option selected by default – Credential Harvest - and launch a Credential Harvest attack. Click Next to proceed further.
Note: You can also configure custom payloads to suit your requirements.

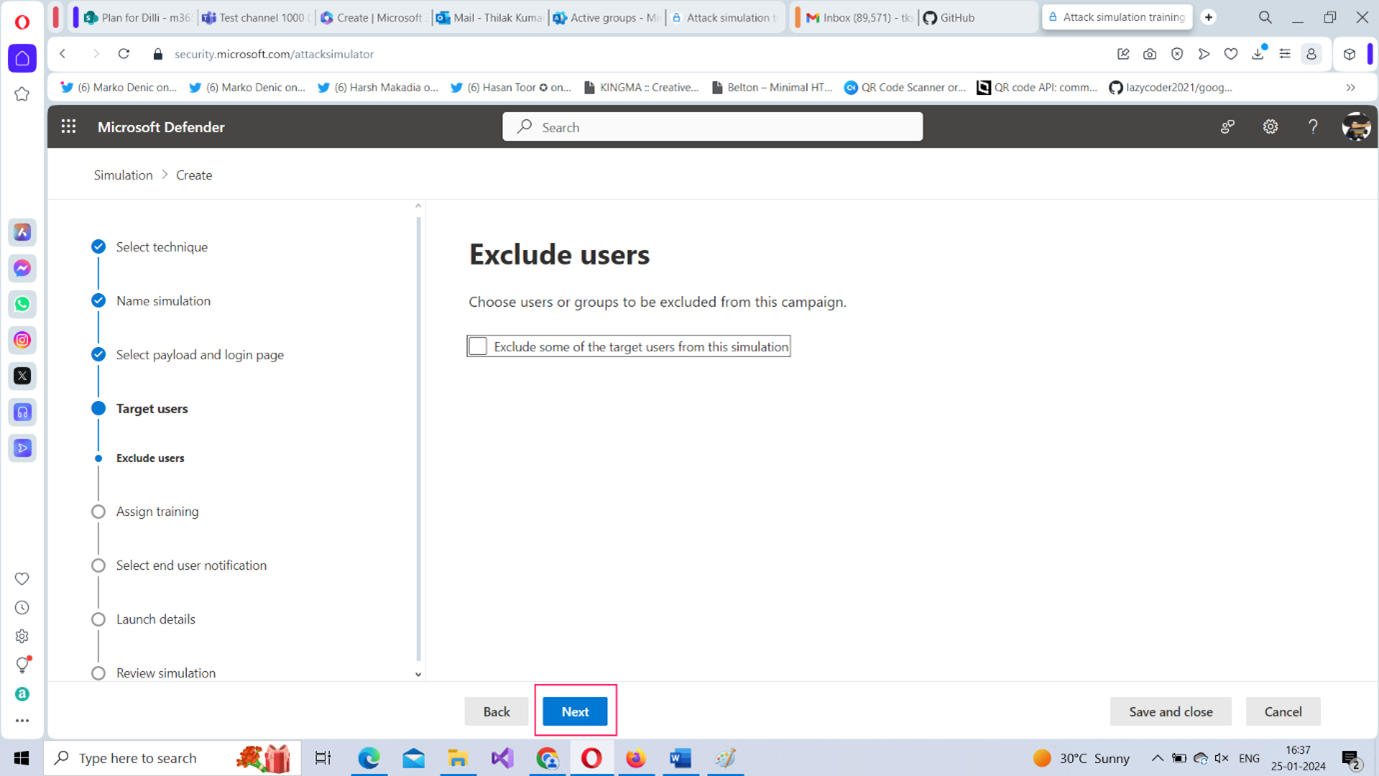
Note: You can also exclude some users or groups from the simulation attack. But we are going to skip this step and click Next to proceed further as shown in Figure 7.
After selecting the required options, click Next to proceed further.

You get a confirmation message (as shown in Figure 15) when the simulation attack is launched successfully.
Taking the Simulation Attack as an End-User
Since the simulation attack was launched for all the users in the tenant, you can take the test to see what happens if you fall prey to the phishing mail.
- Check your Microsoft Outlook inbox. You should receive a Quarantine Notification (shown in Figure 16) suggesting that emails are not reaching your inbox and that you can get them if you click the Release Message button. Go ahead and click it.
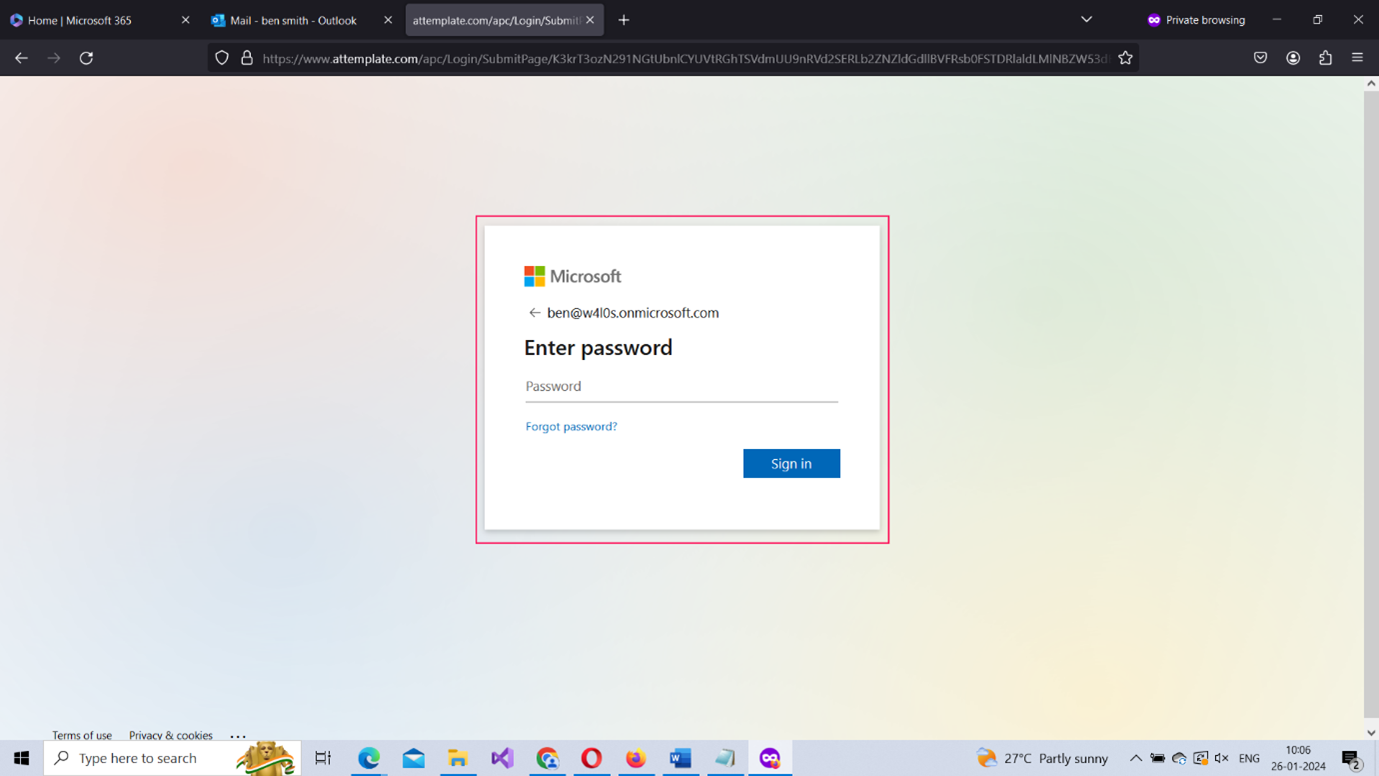
- You will be asked to log in with your Microsoft 365 tenant credentials as shown in Figure 17. (The login form resembles your Microsoft 365 login so that the user can be phished easily). Enter your credentials and sign in.
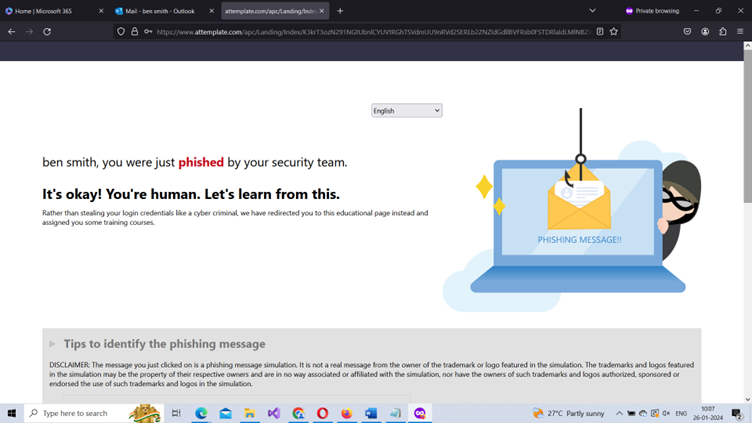
- You are led to the phish landing page - you configured while setting up the simulation attack – stating that you have been phished and that you need some security training to recognize phishing emails in the future (as shown in Figure 18).

Analyzing the Simulation Attack Results
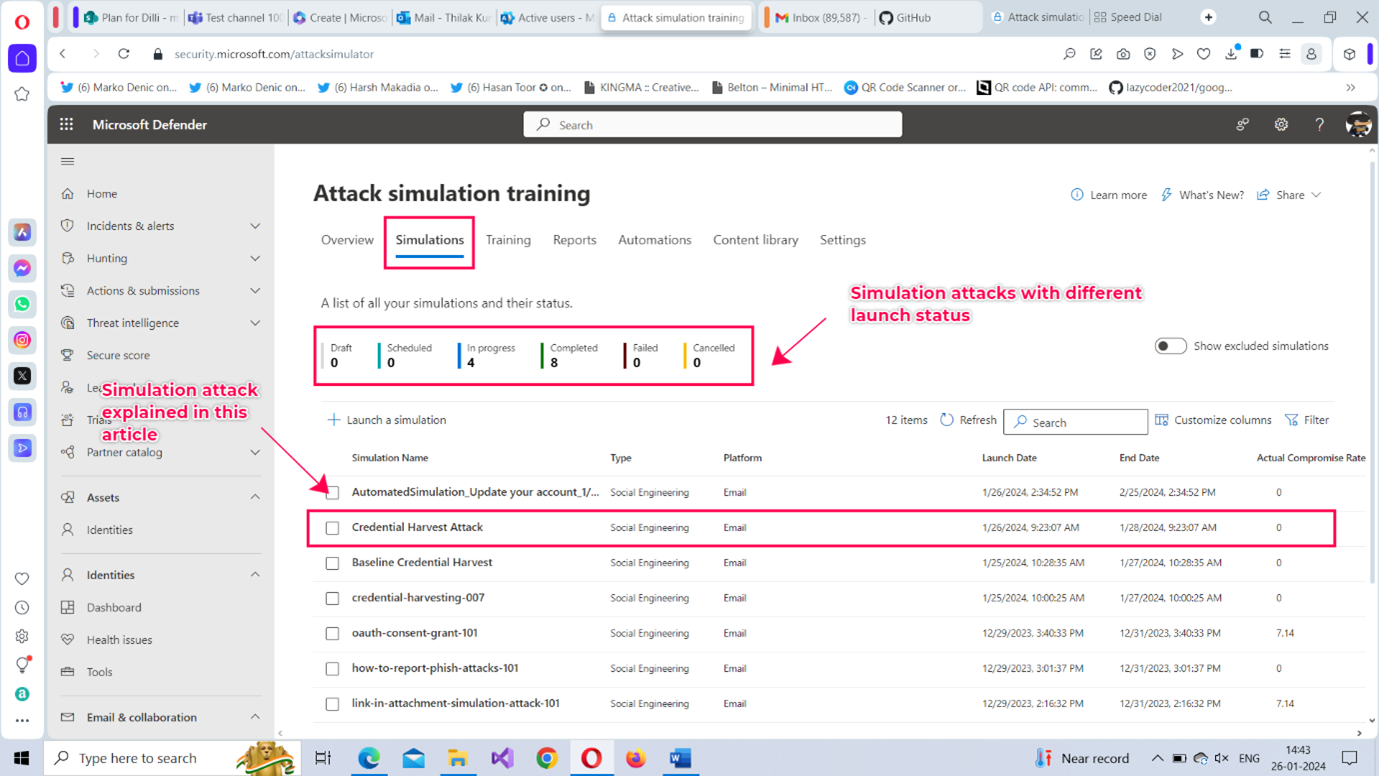
You can check how the simulation attack you launched is performing under the Simulations tab. The Simulations tab – if you have configured several simulation attacks – should look like the one shown in Figure 20.
- Select the Credential Harvest attack simulation from the list of attacks.
- The page opens as shown in Figure 21. Some important details listed here are:
- The Simulation Impact card shows how many users got compromised and those who were security-aware enough to report the message as phish to the admin. Links to the compromised users and users who reported are also present.
- The All user activity card summarizes the user actions involved like the number of users who clicked the message, the number of users who went ahead and supplied their credentials, the number of users who deleted the message, etc.,
- The Delivery Status card explains how the simulation attack is being rolled out by reporting on the number of user inboxes that successfully received the phishing mail and the number of positive reinforcement messages delivered.
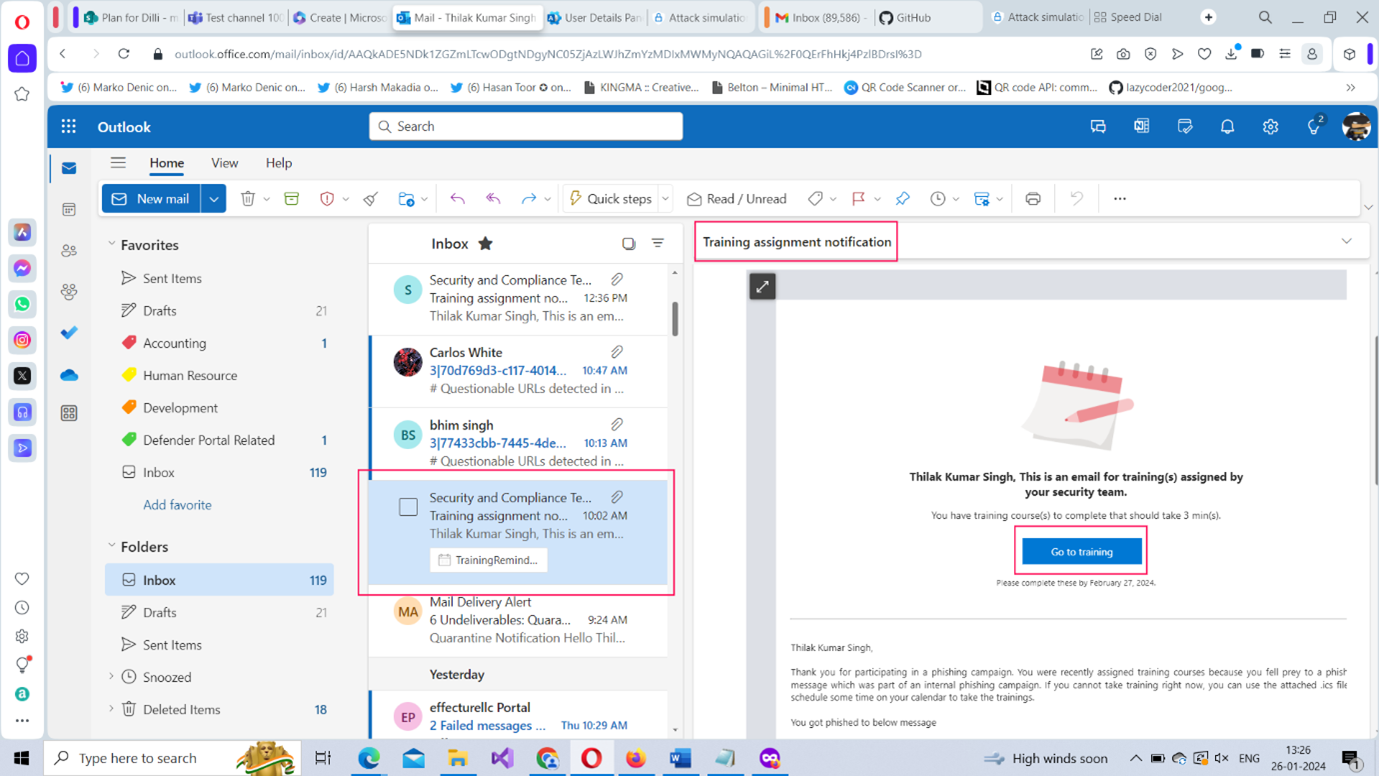
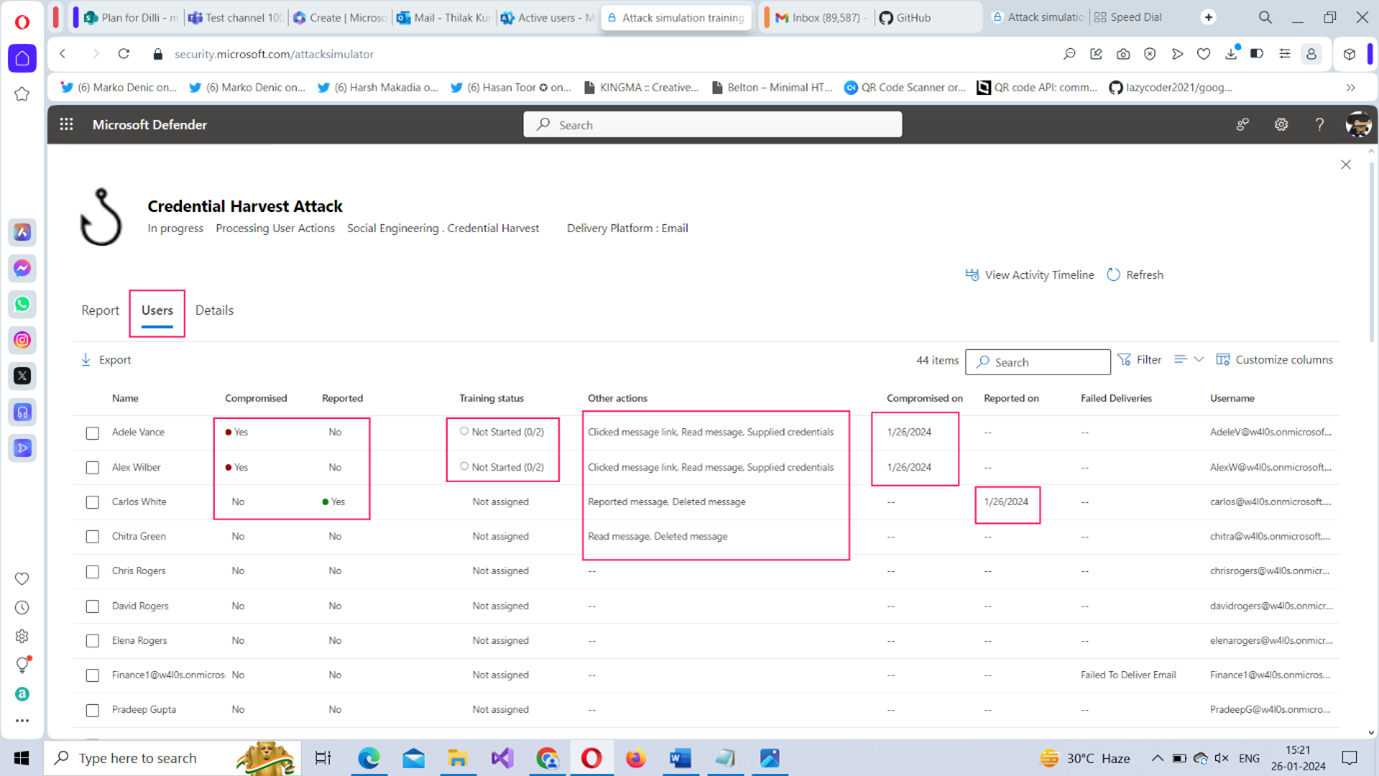
- Select the Users tab to get user-related details as shown in Figure 22. Here you get a detailed view of users who were compromised, those who reported the message, and those who deleted it, etc., The training status column helps you identify whether users who failed the attack have taken the allotted training or not.
- The Details tab lists the attack’s details like its description (that specifies the Delivery Platform, the target users involved, type of attack, etc.,) and also contains training and notifications-related information.

Viewing Reports Across Simulation Attacks
When you have many simulation attacks configured, the reports across simulation attacks offer valuable insights as shown in Figure 23. It gives you the following info:
- percentage of simulated tenant users
- percentage of users who have completed the training
- number of repeat offenders
- users less susceptible to phishing attacks etc.,
You can click on the specific report to get more detailed information.
Note: Simulated tenant users are users who have been involved in simulation attacks; repeat offenders are those who have repeatedly failed to pass the simulation attacks.

Customizing Simulation Attack Settings
You also get to customize a couple of attack simulation training-related settings under the Settings tab as shown in Figure 24.
They are:
- Repeat offender threshold – indicates the number of simulation attacks a user should fail before being labeled as a repeat offender. The default value is 2 which can be customized to suit your requirements.
- Training threshold – represents the number of days that should be passed before a specific training module can be re-assigned to a user. The default value is 90 days which can be customized to suit your requirements.

What's Next?
In the next article, let’s understand how you can automate these simulation attacks by scheduling them to be executed on a weekly or monthly basis. This eliminates the need of you having to configure the attacks manually if wish to assess the security knowledge of your users over a period of time.
How to use this guide?
It is best to read the articles in the order they are written. And since Microsoft 365 security is a vast topic, remember to watch out for this corner for new articles every week.
- Signing up with the 90-day free Microsoft 365 E5 Developer Program
- Ensuring Microsoft Defender for Office 365 is Turned On
- Microsoft Defender Preset Security Policy
- Deploying Microsoft Defender for Office 365 Standard and Strict Preset Security Policy
- Differences between Built-in, Standard, and Strict Preset Security Policies
- Creating Simulation Attacks for spreading security awareness among users
- Automating Simulation Attacks
- Creating Custom Policies for your organization security
**** Articles marked in red will be uploaded soon! Keep an eye on this corner!