How to Import Microsoft 365 Users Using CSV files?
Note: Most of the images contained within this article are gifs. Click them to understand Microsoft 365 User Import better.
Sign in to your Microsoft 365 tenant with your login credentials and do the following.
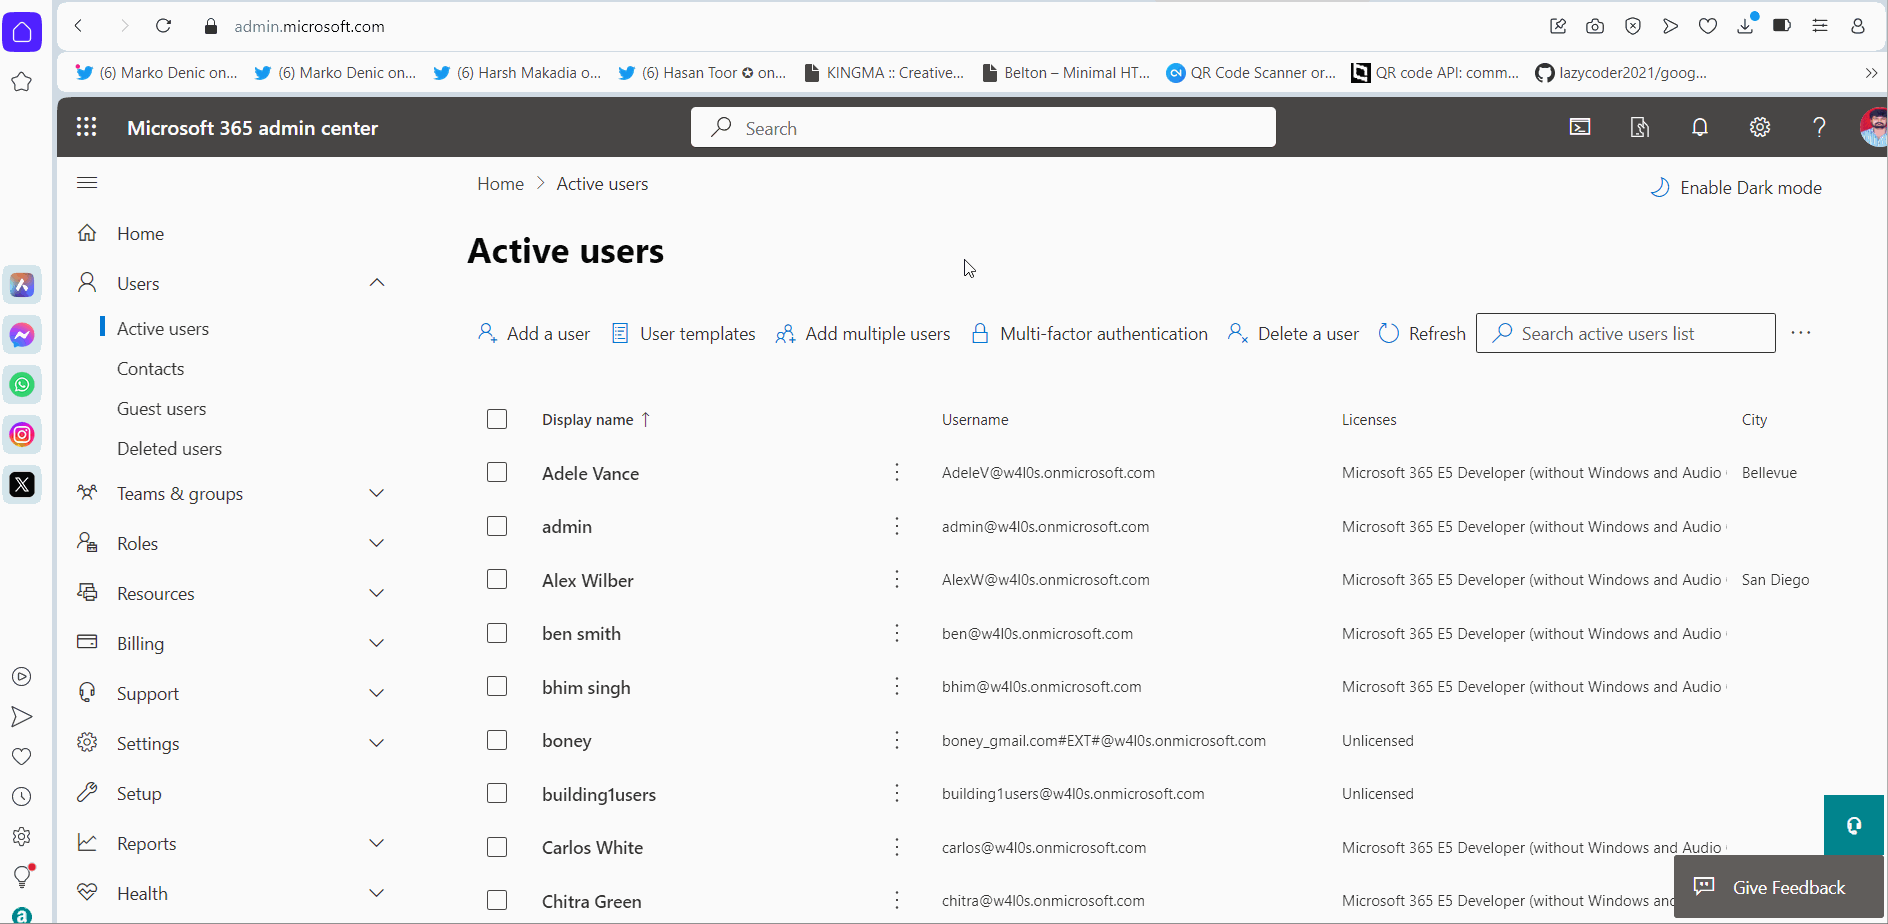
- Go to Microsoft 365 admin center by selecting the Admin tab.
- Select Show All >> Users >> Active Users option.
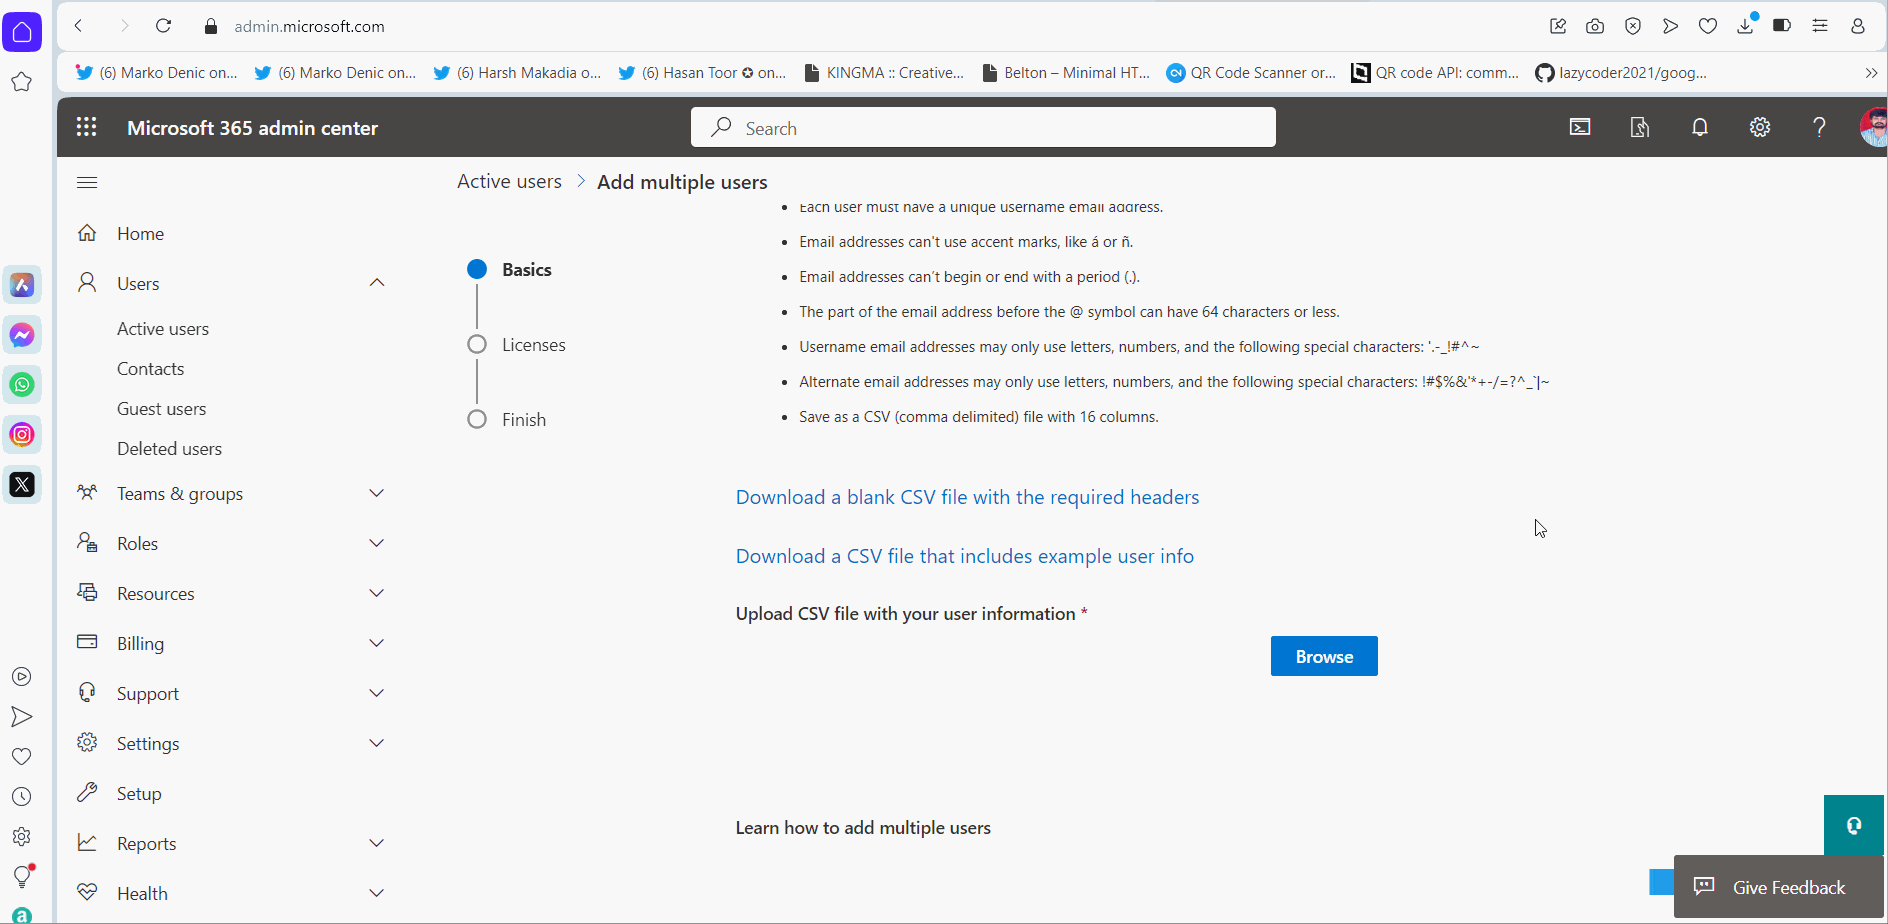
- Click Add multiple users and scroll down to I’d like to upload a CSV with user information checkbox.
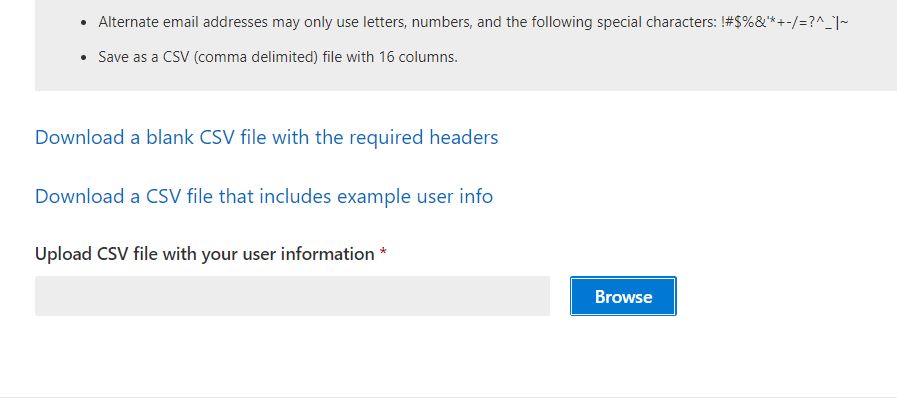
- Enable I’d like to upload a CSV with user information checkbox. You’ll notice 2 links as shown in the image below:
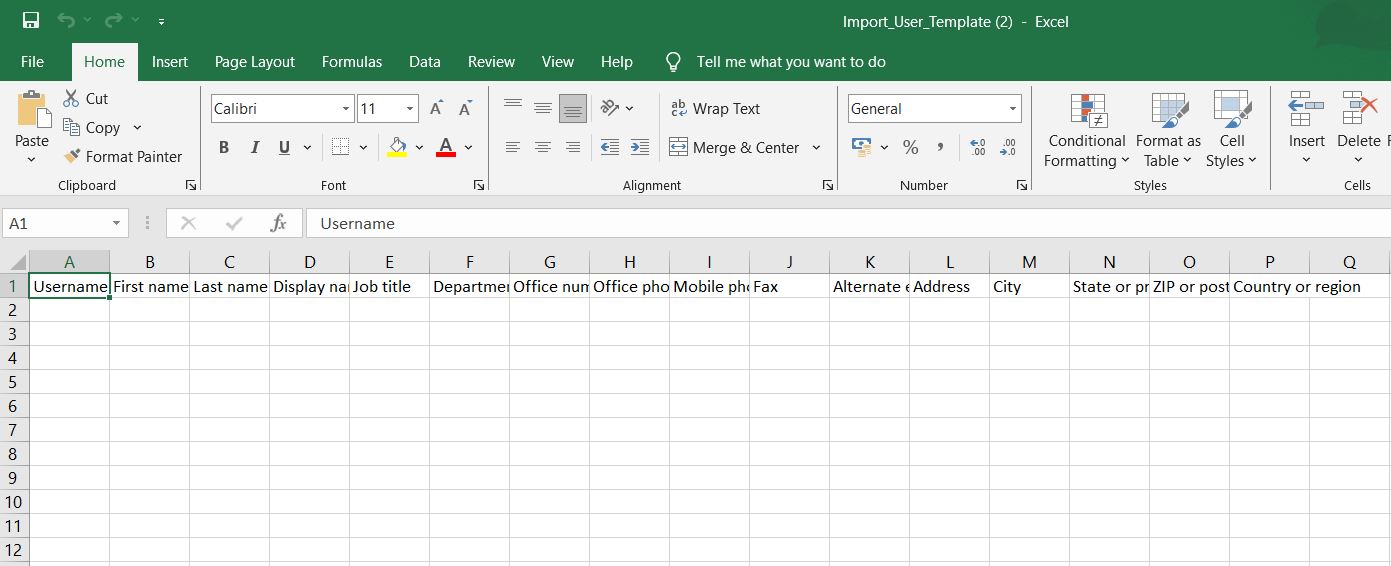
- Download a blank CSV with the required headers: if you download the sample CSV file using this link, the sample CSV file will only contain headers as shown in the image.
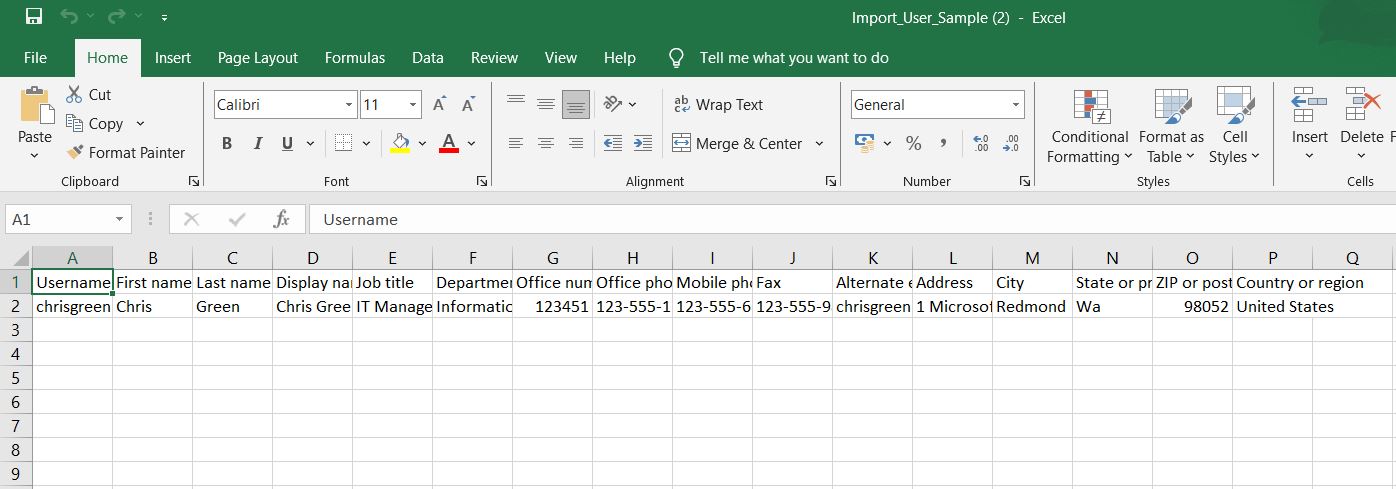
- Download a CSV file that includes example user info: if you download the sample CSV file using this link, the sample CSV file will contain example user info too as shown in the image.
- Add your user details to the CSV file and upload the same.
The above procedure is explained in the form of click-and-play GIFs below, with each GIF representing a numbered step.